Plotting like Brandon Sanderson with LivingWriter

If you are a fan of epic fantasy novels, then you must have heard of Brandon Sanderson, author of the Mistborn and The Stormlight Archive series. His novels have been hailed to be one of the best in the fantasy genre, and to be an author whose works are called the best, there is some merit in knowing how to do plotting like Brandon Sanderson.

Thankfully, Sanderson is a very engaging author, who has offered a lot of writing tips to his fellow authors in many avenues, and one of his crucial teachings is his method of plotting.
The “Plot” and the Ones that Come Before It
Before developing the actual plot, we need to first understand what the plot should achieve. The plot is basically a set of promises that you as a writer made to the readers. The novel should then revolve around getting around to fulfill those promises. You need to set up these promises in the first parts of the story, to entice the readers to see how you will achieve these promises.

To fulfill these promises, it is great writing advice to set up the agents and mechanisms that will accomplish them before they are actually used by the plot. Foreshadowing is an effective way of introducing these mechanisms to the reader through an innocent-looking chapter.
Through foreshadowing, the twist becomes even more surprising rather than randomly popping out for the convenience of the plot, a la deus ex machina. This gives an exhilarating feeling of reward to readers for either missing out a glaring fact or correctly guessing the end. This is a great way to fulfill your promise to the reader.
These will come handy when you want to learn plotting like Brandon Sanderson, as his method primarily deals with mapping the “promises” or your plot points.
How Sanderson Plots

Brandon Sanderson calls his outlining method “Points on the Map,” which can be similar to other writing frameworks like the Three Act Structure. As the title indicates, you are to deal with your outline as a map, and any map will include a destination. Hence, it is important that you think of the ending first. It doesn’t have to be anything conclusive or final; an inkling or vague imagining of how your story will end is enough for the outlining phase.
Next, you will prepare four “parts,” although the number can vary depending on how your story goes. Each part will hold one or more “climaxes,” the major events or revelations that serve as distinct milestones or “stops” in your map for your story. In your outline, these will be the headings.
Notable “climaxes” that you need to include would be the basics of a chronological story: the start, middle, and end. The middle can easily break out into multiple parts, depending on how you would structure your main plot and its subplots (if there are any) but the start should always introduce your story, your characters, the settings, and the conflict. The end, obviously, would be the culmination of the story, the fulfillment of your promises.
At this point, it is obvious that Sanderson expects to have an idea of the story before he goes into outlining. Sanderson works in a general-to-specific way: the process is simply to concretize these ideas into tangible plot points that he can easily organize.

The “stops” you have identified in each part are exactly that: stops or destinations, so now you have to work out on how to get to that destination. You can easily fill up important scenes under each heading. This is to work out the foreshadowing in your novel: you control the events that happen that will eventually lead to the climax.
It will be in this part where your outline will start to really crowd out. Since you start to get into specific scenes, you begin to build up not just toward the climax in each part, but also toward the intended end of the story. These scenes should give a sense of progress to the reader, that the main character is achieving something as time goes on.
To make the job manageable, you can first start with organizing the scenes in each part. Confine the story progression within parts first, so that you don’t get overwhelmed with looking at the bigger picture. When each part is sufficiently filled with its “roadmap” leading to its “destination,” you can then do a second run-through of your outline.
This second run-through will deal with the overall plot progression and the details that you might have missed to include. Now, you will check for plot holes and fill those in with the requisite scenes. These scenes can be often smaller than those you’ve written for each part.

You can work out the foreshadowing of the end in these innocently minor scenes. This can be the mundane introduction of the plot twist, where it may seem like it does nothing for the plot for now. Foreshadowing this can also easily take up a separate, branching list that helps explain and show how you would expose the twist ingenuously.
You can also work out your subplots in these scenes. In a plot-centric story, character development phases can readily fit into the outline through these scenes. Major milestones in your subplots freely slot in these scenes.
By now you should have a sufficiently large outline that details how your story would go from start to finish. However, this is not yet the end of the outline. Sanderson emphasizes that he adds more plot points to his outline as he writes his manuscripts. His outline evolves into a more concrete manifestation of the novel as the story and its characters begin to properly take shape in his mind.

This indicates that his outline is very much organic; it is not a static document that you will reference as hard truth when you’re writing your drafts. As new ideas emerge and your vision of the story becomes clearer, your outline should also evolve.
Plotting Like Brandon Sanderson with LivingWriter
With the reiteration of the article title, we are here not just to teach you how to outline and plot like Brandon Sanderson, but to use that knowledge in a convenient and easy writing platform like LivingWriter. LivingWriter boasts a robust outlining feature set that goes very well with Sanderson’s method, so let’s check it out.
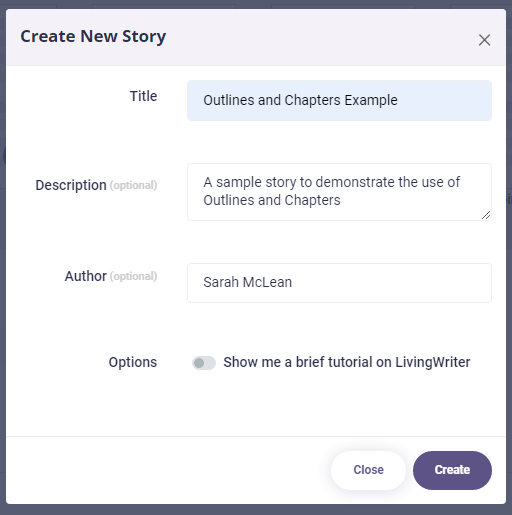
- Go to LivingWriter. In the Templates section, click on the Blank Story template and fill up the story title and other optional details.
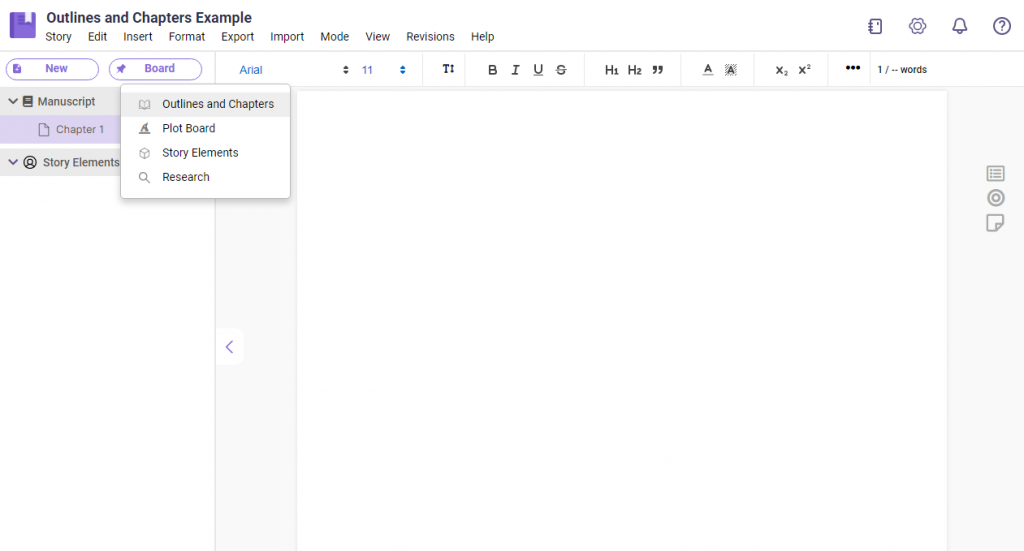
- You will be led into LivingWriter’s main editing document. However, since we are in our outlining phase, we will deal with that later. Instead, click the Board button on the left sidebar, then go to Outlines and Chapters.
- LivingWriter’s Outlines and Chapters has four levels of hierarchy: Section, Outline, Chapter, and Subchapter. A Section can contain multiple Outlines, an Outlines can contain multiple Chapters, and a Chapter can contain multiple Subchapters.
Since Sanderson’s method only utilizes three levels of hierarchy, we will instead use Outlines, Chapters, and Subchapters.
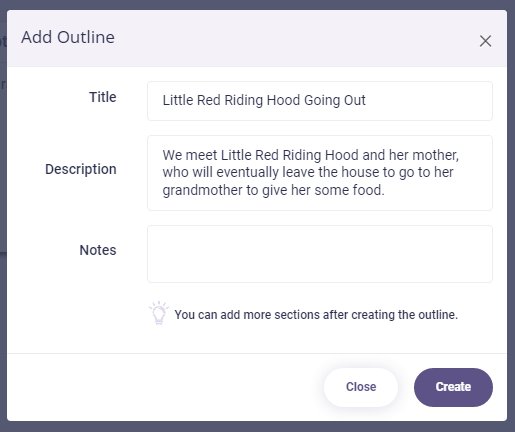
- Following Sanderson’s process, we’ll first make the “parts.” However, we will de-partition them into the “climaxes” instead: we can make an Outline for each “climax.” Simply right-click on any empty area in the Board, and select “New Outline.” This will open a dialog where you will fill up the Outline title and description. The title can stand for the “climax” title, while the description can be filled up with necessary details for the “climax.”
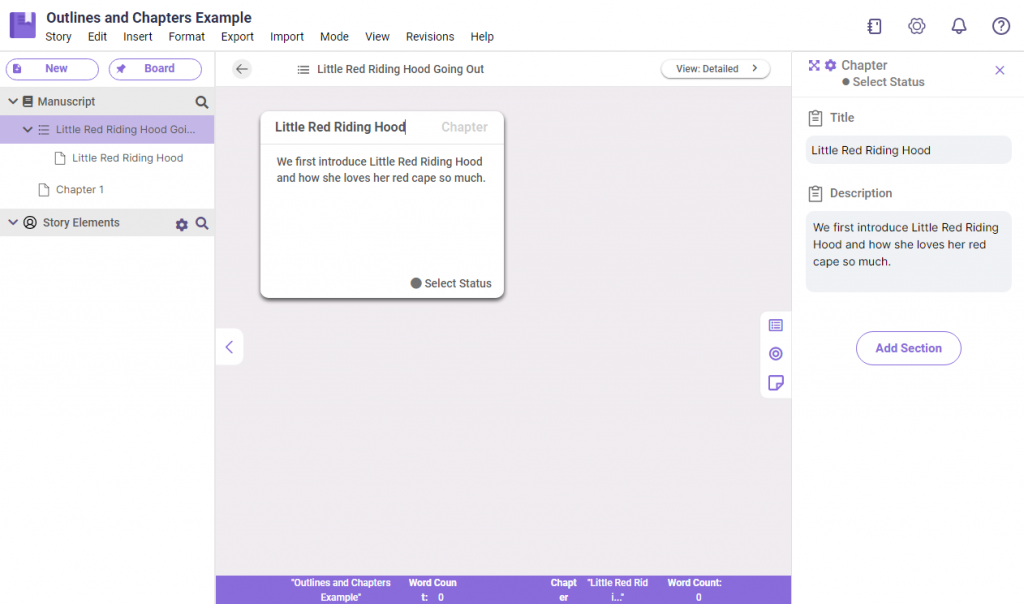
- After making the Outline for the “climax,” you can click on the upper-right corner of the box of the Outline to proceed into the next level of hierarchy, the Chapters. It should be noted that Chapters and Subchapters are each accompanied with a document. We recommend that you use the Chapter document for your first draft, so each of the scenes that build up into the “climax” should at least constitute a chapter in your manuscript.
Similar to making a new Outline, right-click on any empty area and select “New Chapter.” Since we’re still in the outlining phase, we can choose to ignore the accompanying document for now and instead focus on the description and Chapter notes that we can fill up beforehand. You can access and edit those data in the right sidebar if you missed the dialog. This also applies to Outlines and Subchapters.
- Similar to before, you can click on the upper-right corner of the Chapter box to access its Subchapters, making a new one in the same manner as the others. The Subchapter would now house the specific scenes, and it also has the same notes feature as the others, helping you outline integral scenes in a chapter.
What makes the Subchapter special is that it has an accompanying document that is separate from the Chapter that it is a part of. So, you can have the overview of the scene in the notes of the Subchapter, then write up a draft of that scene in its document. Once you are in the first draft phase of your novel, you can pull up that drafted scene from the Subchapter and place it in the final Chapter document.
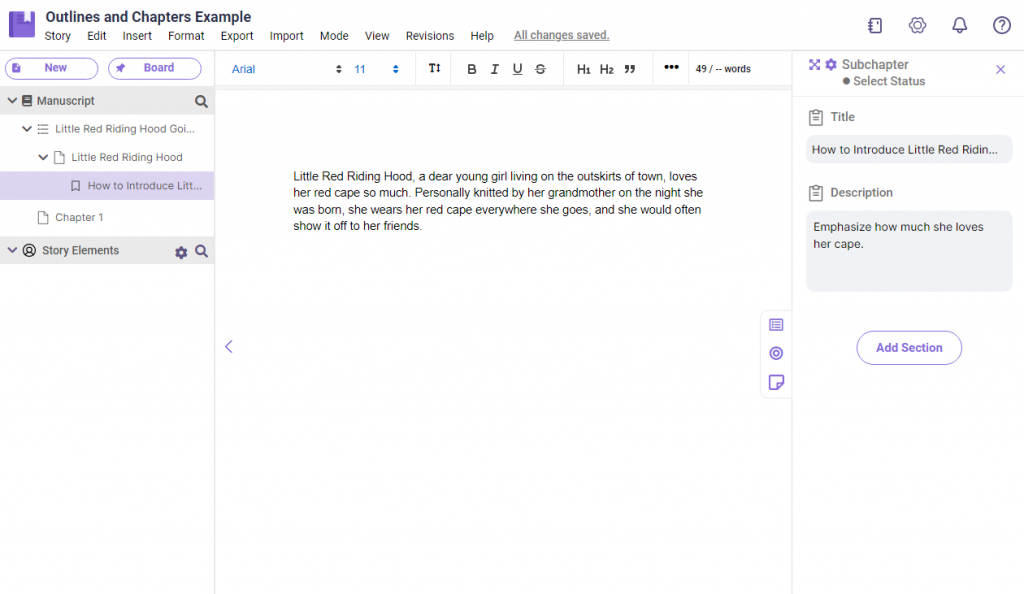
This is especially great when you have a very clear vision of a very specific scene in the novel, and you want to write it down before you lose that spark.
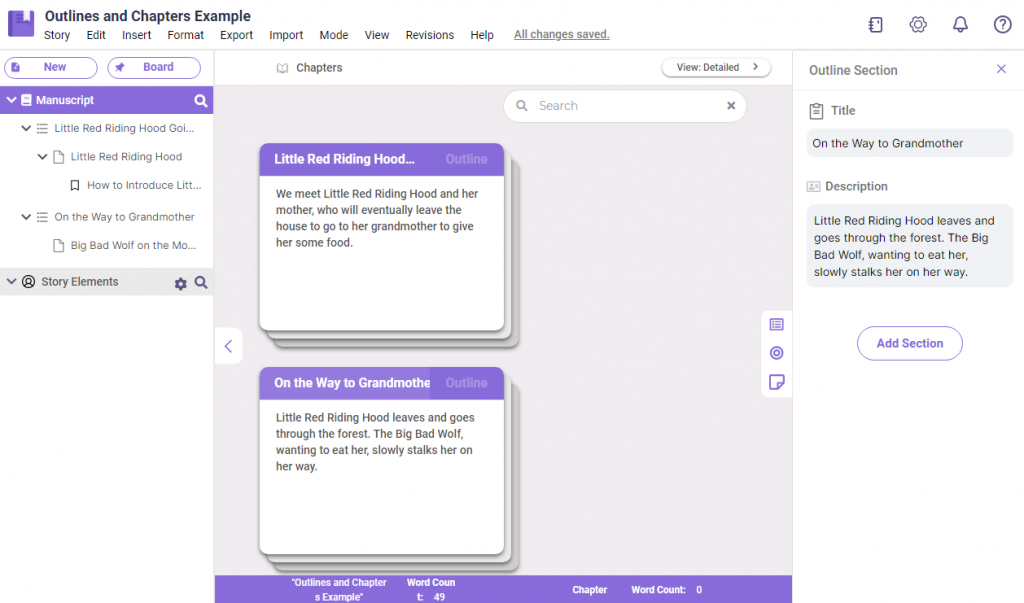
- You can have an overview of the Outlines, Chapters, and Subchapters of your story on the left sidebar, under the Manuscript section. The notes of each of those will also be readily available on the right sidebar.
If you are on the Board view, you can also easily drag and drop the boxes to organize them, making it convenient to move around scenes and chapters.
Write Your Next Bestseller with LivingWriter
Equipped with knowledge and the tools, you are more than ready to embark on that writing journey toward your bestseller novel. With a trusty writing companion like LivingWriter, you’re sure to have a great time writing that manuscript. Try it out now!