How To Write A D&D Campaign With LivingWriter
Writing a Dungeons and Dragons campaign is a fun and rewarding process that can lead to hours of fun for your playgroup. That said, it can be a very daunting task. There are many things to create, design, and write, and you’ve always got to consider how it will all play out. While it can be a lot, building fun D&D adventures doesn’t have to be overly burdensome if you have a solid system. Today, I’ll show you how to write a D&D campaign with LivingWriter.
I’ll go over an easy way to build detailed adventures in a timely fashion and how LivingWriter features aid in the process. By the end of the article, you should have all the tools you need to build a solid, fun-to-play D&D campaign. So, without further ado, let’s get started.
How To Write A D&D Campaign Using LivingWriter
First, I want to say there are no right or wrong ways to write your adventures, campaigns, or modules. Different styles and strategies work well for different DMs. Having said that, in my experience, the methods below can make your life as a DM easier, your work more streamlined, and your finished products more fun to play. I’ll break everything down step by step, but here’s the overview:
- Create a general storyline starting with a problem/villain.
- Choose general (and more specific) locations for the adventure.
- Pre-plan 5-10 encounters (combat, puzzles, or social interactions)
- Establish player motive and “kicking off” or “incite action scene
- Outline key NPCs
Sometimes, depending on your inspiration, you may do these steps in a slightly different order, and that’s ok. With that out of the way, let’s jump into the first step.
1. Create A Villian, Desire, And Means
The first step is to create a very basic outline of your storyline. I recommend starting with your conflict/villain and working from there. The plot’s conflict will help shape what needs to happen. So, identifying it upfront keeps the plot on track.
In addition to your villain, you’ll want to clearly define what they desire and the means they’ll use to get it, as these points will also affect your adventure. Let’s look at an example:
- Villain: Lady Valeria Darkbane.
- Goal: Her goal is to usurp the kingdom’s throne, plunging the realm into darkness and chaos.
- Motivations: 1. To avenge her family’s downfall at the hands of the royal family. 2. Because she is power/control hungry.
- Means: To do this, she’ll employ:
- Manipulation and deceit: she uses her charm and influence to sway key figures in the kingdom.
- Dark magic: uses forbidden arcane arts to bolster her strength and bend others to her will.
- Mercenaries: she hires ruthless mercenaries to do her bidding, destabilizing the kingdom’s defenses and sowing fear among its people.
Adding The Basic Story
With the bad guy fleshed out, I suggest you start at the end of the story. Yep. The very end! How do you want your adventure to conclude? Let’s say the players figure out that Lady Valeria Darkbane’s life is being sustained by an amulet that she wears around her neck, and while it is intact, she cannot perish.
Therefore, to finish the campaign, the players must first deal with the amulet and then defeat Lady Valeria Darkbane.
With the antagonist (and their plans and motives) laid out and the ending idea done, the basic storyline has written itself. You can add as much detail as you’d like, but these “rough” ideas often work well because you leave the door open for players to influence the game.
In my experience, too rigid of a system can limit player creativity and take up unnecessary time to create. If your idea of a fun time is writing extensive details, by all means, go wild, but I did want to mention they aren’t usually necessary for a fun game.
Adding The Story
So, our story arc could be as simple as, “With her insidious plans and relentless pursuit of power, Lady Valeria Darkbane poses a grave threat to the kingdom’s stability, and it falls to the players to thwart her schemes and restore peace to the realm.”
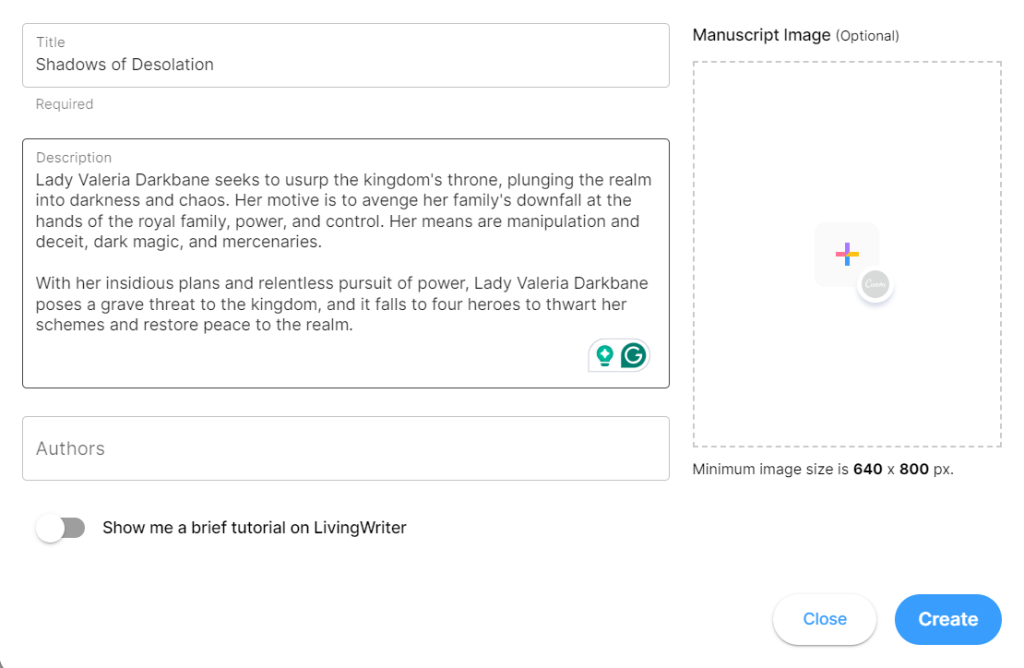
Once you head to LivingWriter, you can add these details directly into the story by creating a new project and choosing a title. There’s also the option to add an image for your campaign, which is cool.
Adding Characters
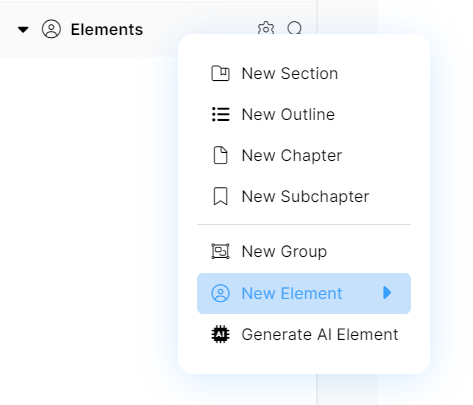
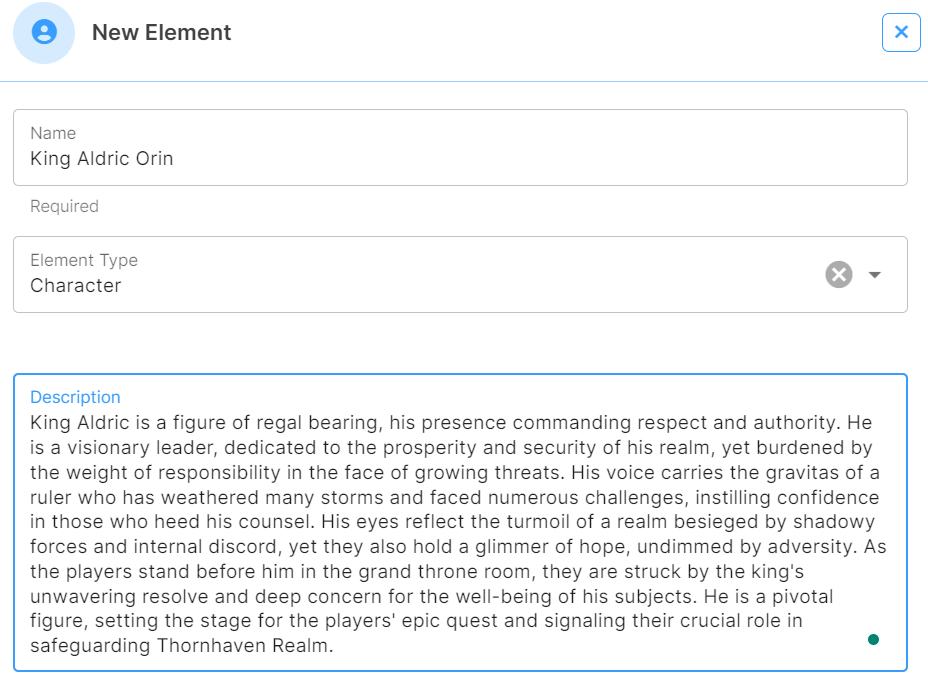
You can also add your character directly into the software by right-clicking on the “elements” section:
From there, you’ll add your character name and a description. Once you’ve done that, clicking the character will bring up their profile, allowing you to see their info and add additional sections, nicknames, relationships, and images. From here, you also have AI analysis, a “goals” section, a note section, and stats.
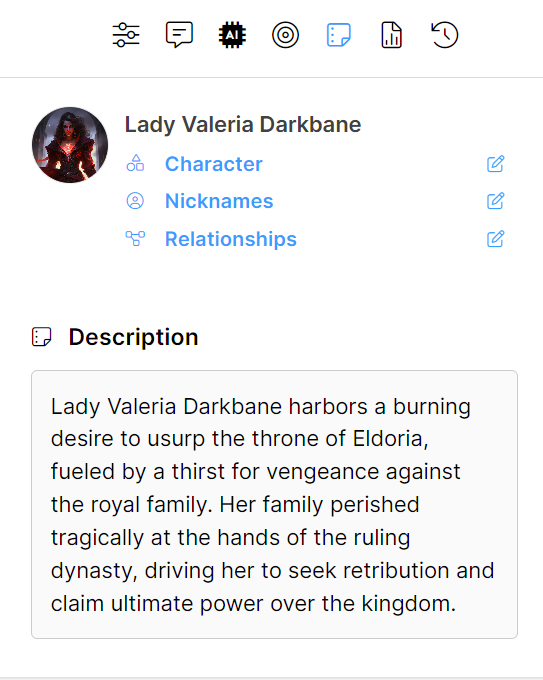
In LivingWriter, an “element” can refer to a character, setting(s), object, or custom entry. So, you’ll have these same options for your locations, mystical weapons/artifacts, and whatever else is crucial to your campaign.
2. Establish A Kicking-Off Point And Player Motive
For step two, you’ll need an idea of how to kick your campaign off. Exactly how you do this depends on preference, the campaign, and your players’ experience. If they’re new to RPGs, I recommend just starting – For example, “the four of you are walking down a wooded path when…” and leave it at that.
When dealing with more experienced players (or gungho noobies), I pull each player aside, describe the opening scene, and have them decide why they’re there. This can add to the realism for players who really enjoy the roleplaying aspect of Dungeons and Dragons.
For this campaign, as mentioned, the starting point is that the players encounter someone being accosted on a wooded road outside the kingdom. After saving the people, they escort them to the palace to report the incident to the king. He informs them of the kingdom’s current threats and asks them to help thwart Lady Valeria Darkbane’s nefarious plot.
To keep it basic, their acceptance motivations stem from a duty to protect the kingdom, a desire for adventure and glory, personal vendettas against the villain, or loyalty to the royal family. If you allow your players to develop their own motives for their characters, things can be very dynamic as side plots and ulterior motivations naturally form.
In general, though, you’re good as long as you know how the story will start. So, don’t overthink this step.
2. Pre-Plan Your Encounters
I recommend planning several (5 to 10) encounters for your players. Each of these should have a few creatures or NPCs (combat), something to figure out or solve (puzzles), or a social interaction to traverse that allows them to role-play.
Adding Encounters
You can write each of these encounters into LivingWriter as a chapter. Here, you can write as much detail as you’d like into the scene with everything you’d expect from a traditional word processor. However, you don’t have to go into detail, and just like for your characters, you can see a general overview and notes for each encounter.
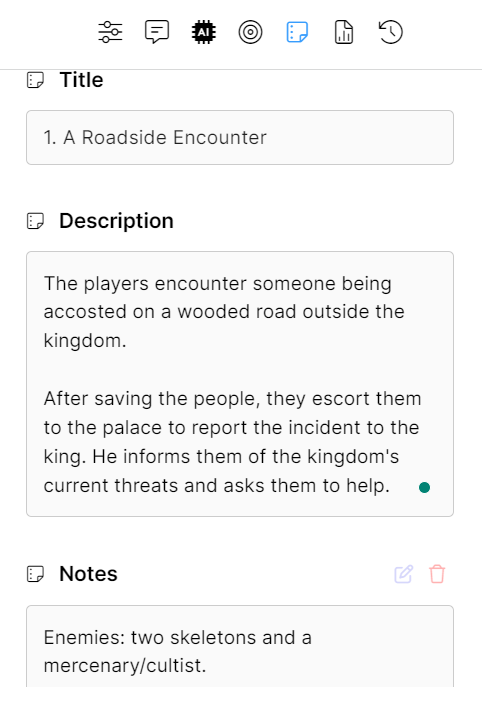
These features allow you to view essential elements of each encounter (such as enemies) at a glance and save you the trouble of flipping through notes or DnD books in the middle of your game.
Element Integration
Another invaluable LivingWriter feature for DMs is that elements are brought to life within your adventure. Whenever you type a character, setting, or object you’ve entered as an element, it’s pulled in like a link. This link will show you the element’s info, notes, and more.
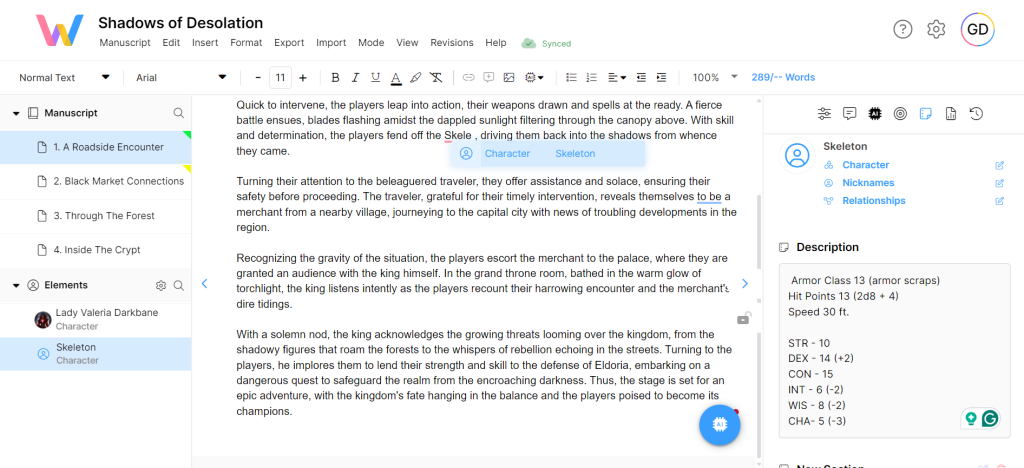
This is particularly helpful for quick access to the stats of monsters and NPCs within each encounter. If you add your monsters (in this case, a skeleton) as an element and add their basic stats, clicking them within your adventure will display all the critical info with the click of a button.
Having monster stats available at the touch of a button (by monster name, too) is much easier and faster than flipping through notes or the Monster Manual looking for info in the middle of your game.
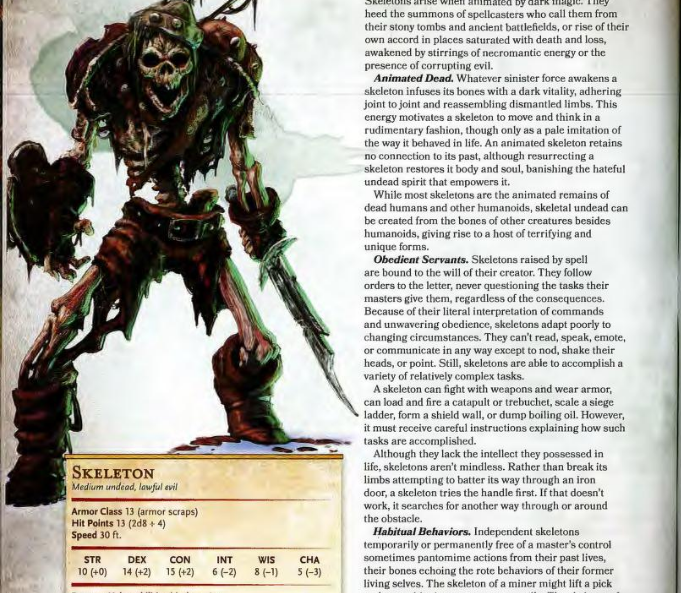
Speaking of the MM, you can find stats and info for all the monsters I’ve mentioned here in the free interactive PDF version of the D&D Monster Manual.
We’ve covered the first encounter (our jumping-off point) above. For a thorough example, I’ll also include the other encounters so you’ll have a clear idea of how to write a D&D adventure from start to finish.
So, encounter one is pictured above, and from there, we have:
Encounter Two – Black Market Connections
Players travel to a black market to gather intel at the king’s behest. Here, they interact socially with seedy merchants, Ragavan and Kalia, who give them conflicting information. If players can discern friends from foes, they can avoid combat.
- Enemies: Possibly several Goblins and a Spy
Encounter Three – Through The Forest
With the info that Lady Valeria Darkbane is held up in the ancient crypts beneath the kingdom’s outskirts, players begin to make their way there. However, they must traverse a dangerous forest to get there. They face a downed bridge within the forest, and most take an alternate route.
When they do, they are ambushed by a troll.
- Enemies: A troll
Encounter Four – The Ancient Ruins
The party makes it inside and explores ancient crypts beneath the city. The place is a dark labyrinth where they face some traps and puzzles left by its founders. Within several chambers, they encounter undead guardians. Behind a door guarded by a mercenary/cultist, they find one of Lady Valeria Darkbane’s lieutenants and must take him alive to question him.
Once they’ve completed this, they learn of Lady Valeria’s amulet and that she is preparing an assault on a northern province of the kingdom at this very moment. With that info, the players make haste to that location.
Enemies: Two undead guardians and Lady Valeria’s lieutenant.
Encounter Five – Road To War
Players come across the battle remnants on the way to the besieged province. The landscape is destroyed, and there are corpses strewn about the roads. This gives players a chance to explore where they can find loot.
- Loot: 3x Health potions, various weapons & armor, and 30 gold coins.
Note: You should sprinkle loot through the campaign. Treasure charts are found in chapter 7 of the free D&D 5E Dungeon Master’s Guide PDF.
Encounter Six – Conclusion
Having made it to the battlefield, they find that Lady Valeria Darkbane has taken the province and imprisoned most citizens. Players can sneak past (or fight) two cultists to enter the hold. When they do, they can free several prisoners (extra XP if they do) and must ultimately fight Lady Valeria Darkbane, a cultist, and two skeletons.
- Enemies: Two door guards, Lady Valeria, a cultist, and two skeletons.
Color Coding
LivingWriter gives you access to the essential info for each scene in a convenient, organized spot. You can also view the chapters as an overview to get a feel for the adventure as a whole and color code them with custom statuses.
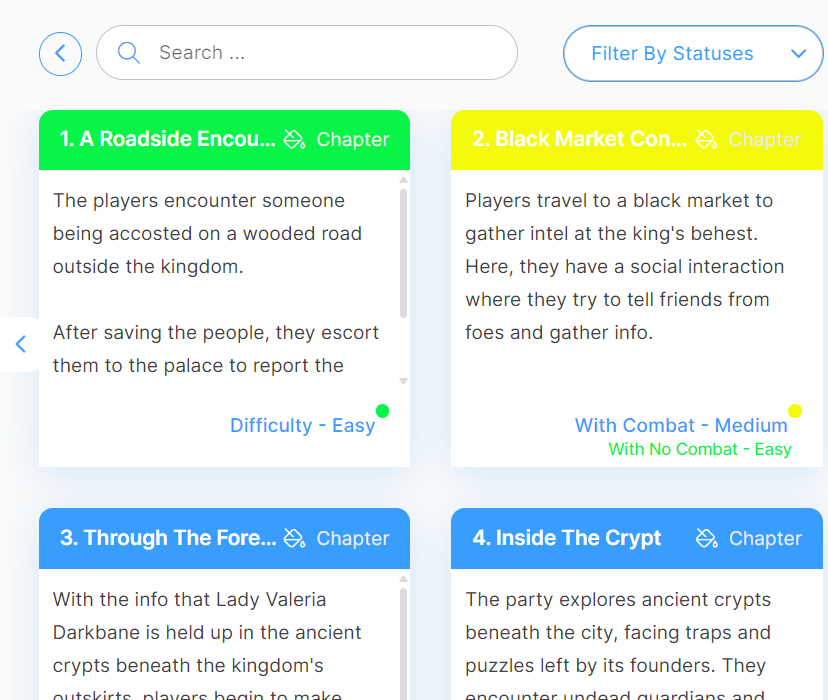
This allows you a god’s eye view of the adventure and superior organization. In this case, I’ve used the color coding system to remember how difficult each encounter is.
3. Choose Your Locations
Now it’s time to flesh out some of the locations in the adventure. If you’ve ever tried to write a D&D campaign before, you may have found the world-building process difficult or, at least, time-consuming. The beauty of starting with the conflict, antagonist, and key encounters is knowing which locations you’ll visit in the module.
In this case, we have:
- A stretch of road where our first encounter takes place
- The throne room, where they receive orders from the king
- A black market
- A wooded forest with a broken bridge
- Several chambers of the ancient ruins
- A stretch of road destroyed by war
- The final province and the hold where the battle takes place
To complete the adventure, you only need descriptions of these seven locations! Granted, you can build your world as much as you’d like, you don’t have to create an entire realm to run your adventures. And honestly, you can make some of these (like the stretch of road) up on the spot if you want to, and I promise your play will not suffer.
So, how do you create the locations you do want to have established? You can add them directly into your adventure as elements like with your characters.
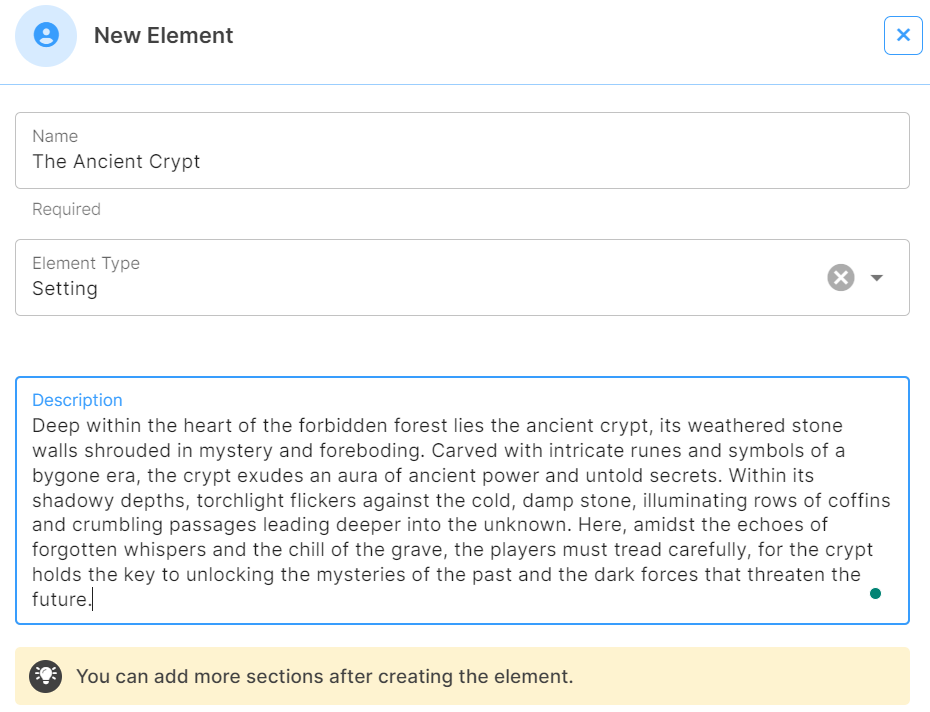
Once you’ve added your info, you’ll also have the same features (mentioned above for characters) available for your settings. This includes the color coding and organization, the quick viewing of descriptions and notes, and the intuitive “link pull in” when you type it.
AI Elements
As mentioned, we have already established our locations for our adventure. So, we don’t have to worry about building many things we won’t use. That said, if you want a quick way to create a larger realm for your story settings, LivingWriter AI Elements can help.
Type in a general description of what you want, specify if you’d like an image (you will), and hit enter.
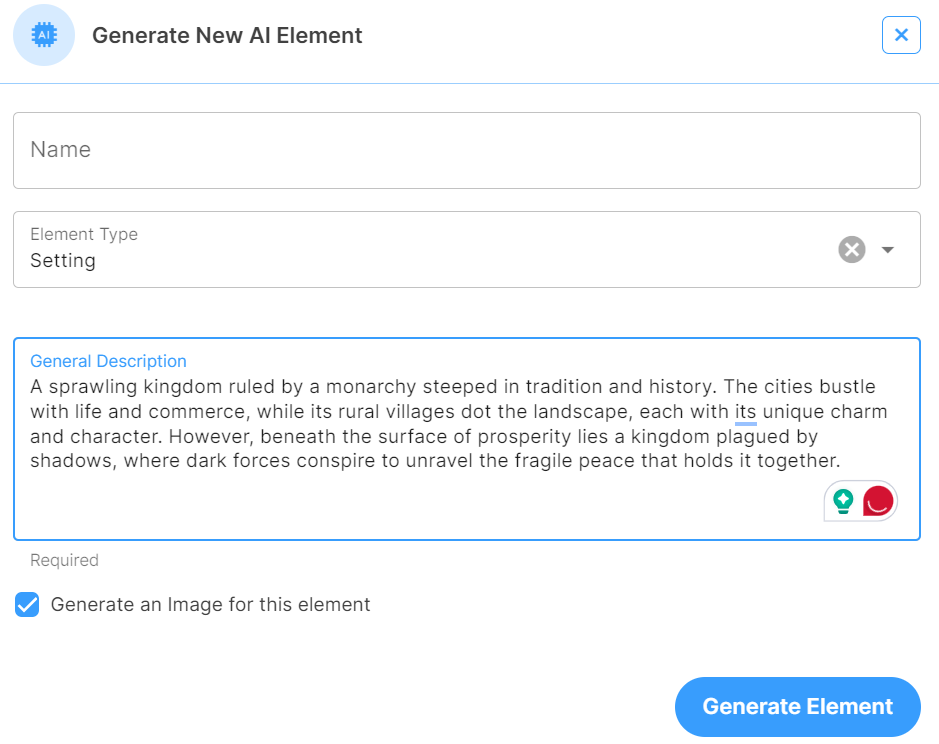
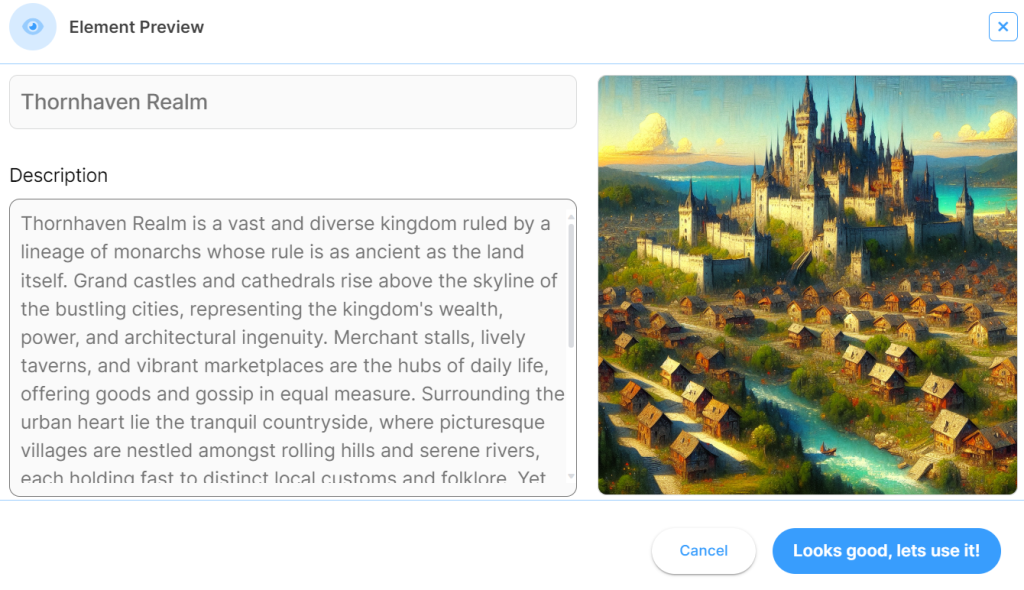
You can use as much or as little detail as you’d like and speak naturally – There are no unique prompts or language required, and you can even get images. Once you’ve entered your basic info, the AI will do the rest. Here is what it generated with the description above:
Basic Map Making
If you haven’t noticed, I like to keep things somewhat simple and recommend others do the same. Far too often, I see people building massive worlds and intricate maps (which is excellent) but getting so caught up that their campaign never gets played.
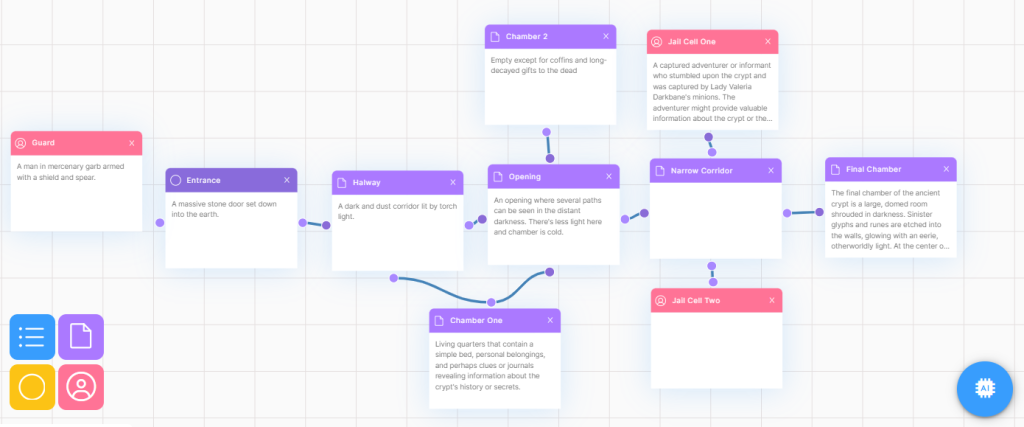
Regarding maps, there are countless apps and sites where you can get very detailed. But for the pretty straightforward locations in the adventure we’ve built, a functional map will more than suffice. LivingWriter has freeform plotting grids to map ideas, plot lines, family trees, and more.
If you get into some significant world-building, all of these applications of the freeform grid can come in handy. However, it can also be used to make a rudimentary map you can easily access as the DM. Here’s a basic map of the crypts:
5. Outline Your Key NPCs
Finally, you’ll have to outline your campaign’s key NPCs. With our simple campaign writing method, you have the luxury (just like with the locations) of knowing exactly which characters you’ll need to run the adventure.
In this case, that means:
- The person being accosted on the road
- The King
- The merchants, Ragavan and Kalia at the black market
- Lady Valeria Darkbane
- Lady Valeria’s lieutenant
Before plotting the adventure, you may have been surprised if I’d told you we’d only need six somewhat detailed, non-playable characters. However, with the critical encounters mapped out, we can be sure the adventure can be run with just these.
Having said that, as always, your adventures will vary, and your game may require more. Even if that is the case, you’ll always know which characters you must write out and to what degree, which is a big help. Logistically, adding your NPCs into LivingWriter is the same as adding all other elements we’ve discussed.
Of course, this also means you have the “link in” integration, AI character creation help, the option to add images, individual note sections, and more. For some characters, a general description of their looks will do; Others will require a bit more fleshing out.
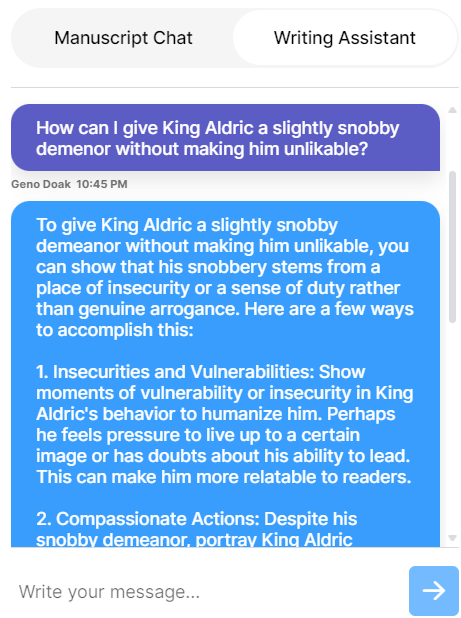
My favorite feature to use on my NPCs is the manuscript chat, which looks like this:

This allows you to ask questions about a specific character (scene, writing passage, or anything else) within your project and get tailored feedback. The chat is familiar with and understands everything within your work and is a phenomenal way to get advice on writing more unique characters.
For example, I asked, “How can I make King Aldric seem snobby without making him unlikable?” And I got this:
Once your supporting cast is fleshed out enough for you to run your key encounters, your campaign should be very nearly ready to play. Depending on your players and storytelling style, you may need to invest a bit more time into minor details. However, I’ve played this campaign for almost a month and only had to address a few small things.
Conclusion
There you have it, my friends, everything you need to know about how to write a D&D campaign on LivingWriter. I hope you’ve found today’s guild helpful and that you try it for your upcoming adventures – You won’t regret it. The concise nature of this system, combined with the features of LW, makes writing dungeons and dragons campaigns a breeze.
Oh, and if you’re wondering, the module I used for my examples yielded eight 90-minute play sessions for my group and me for nearly 11 hours of gameplay. So, don’t let the relative simplicity fool you; your game can have plenty of substance with these steps.
Until next time, may the dice be kind to you.